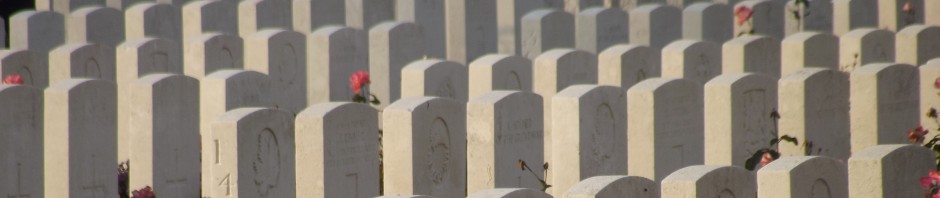
Douglas Haig and his Housing Legacy
When I first started my journey researching my family’s involvement in the First World War, I never expected that my ‘day’ job and my ‘hobby’ might ever cross paths. Yet now more than ever, as we reflect on the post-war period, I find the two becoming more entwined.
My day job is in social housing. I have held a variety of roles in different organisations over the last decade, each with different visions and values; but essentially social housing exists to provide housing for those in need. These days this can apply to a variety of complex personal situations, but after the First World War there were many families who required support as a direct result of the war – this could have been due to the death of a soldier in the family, but also due to the number of wounded and incapacitated veterans.
The wider impact of the war on housing is fascinating in itself. Much has been made of Lloyd George’s (misquoted) promise of ‘Homes fit for Heroes’, but one outcome was the seminal ‘Addison Act’ of 1919 and from this we can track the development of state intervention and control of social housing and even the development of modern construction methods and materials.
One aspect of post-war housing that is probably not so well known is the link between Field Marshal Douglas Haig, Commander-in-Chief of the British Expeditionary Force for most of the war, and the provision of housing for ex-servicemen and their families.
Haig died on 28 January 1928, and as early as two weeks later it was announced that as well as a statue in Whitehall, there would also be a memorial to him in the form of homes for ex-servicemen. Full details of the ‘Lord Haig Memorial Fund’ quickly followed, officially launched at an event on 2 March.
Speakers included the Prince of Wales and the Prime Minister. A national appeal was launched, containing signatories such as Stanley Baldwin, Ramsey MacDonald, Lloyd George, Admiral Jellicoe, Field-Marshal Milne, and Air-Marshal Trenchard. The appeal read as follows:
‘His Majesty’s Government has decided to erect a statue of as a memorial to Field-Marshal Earl Haig. We know, however, that the British people will desire an individual opportunity of expressing their love and admiration for the great soldier and gallant gentleman, who embodied the finest qualities and traditions of our race. We feel too that they will desire this expression to take a form definitely associated with the work which he did for the ex-Service men and their dependants.
Several proposals have been examined by us, but the one which we are convinced would have appealed most to Lord Haig is that of homes, adequately endowed, in various parts of the country, for the benefit of ex-Service men of all ranks, their widows and orphans. It is suggested that these homes should be called “The Douglas Haig Memorial Homes.”
Such a memorial would be no ephemeral one; the homes would be kept in good repair from the Endowment Fund. They would endure long after the Great War ex-Service men had passed away, becoming available for men of future generations of the Regular Forces, the Royal Naval Reserve, the Territorial Force, and the Royal Air Force Auxiliary Reserve, and their families.
We are confident that the public will respond to an appeal for such a fund with which to erect and endow these memorial homes. We consider that the sum required for this purpose, including endowment, will be at least £500,000.
The Prince of Wales (patron of the British Legion) has given his warm approval to this appeal and trusts that the response will be one worthy of the great Field-Marshal.’
£500,000 was no small sum, equivalent to over £20 million today. Initially donations quickly poured in; proceeds from the 1928 Empire Day and collections by Boy Scouts helped, but there were larger donations too. The Anglo-Danish Society donated £25,0000; Imperial Tobacco £5,000; and the Ex-Services Association of India and Burma £3,749.
One ex-serviceman forwarded 2s, 6d, representing his pay for 11 November 1918, suggesting that as little work had been done that day, it would be an appropriate response for all who were serving on that date to donate this amount to the fund!
Individuals and organisations donating over £1,000 were able to endow an individual dwelling; one such house, completed in 1933, was known as ‘The Times House’ following donations from the newspaper’s staff and book club. Another was gifted by Miss A Sawbridge in memory of Captain Frank Symons Mills, Somerset Light Infantry, killed at Langemarck on 5 August 1917.
By August 1928 £170,000 had been received, but it seems donations began to dry up as people struggled economically. By 1930 the amount raised had increased to £221,000, with building works in progress in Liverpool, Morden, Sheffield, Penzance, Ashtead, Bristol, Birmingham, Leicester, Warrington, and West Wycombe. By the end of the year 124 homes had been occupied, increasing to 244 by 1931, and 287 by 1933. Some of the funds were used to give grants in aid of rent.
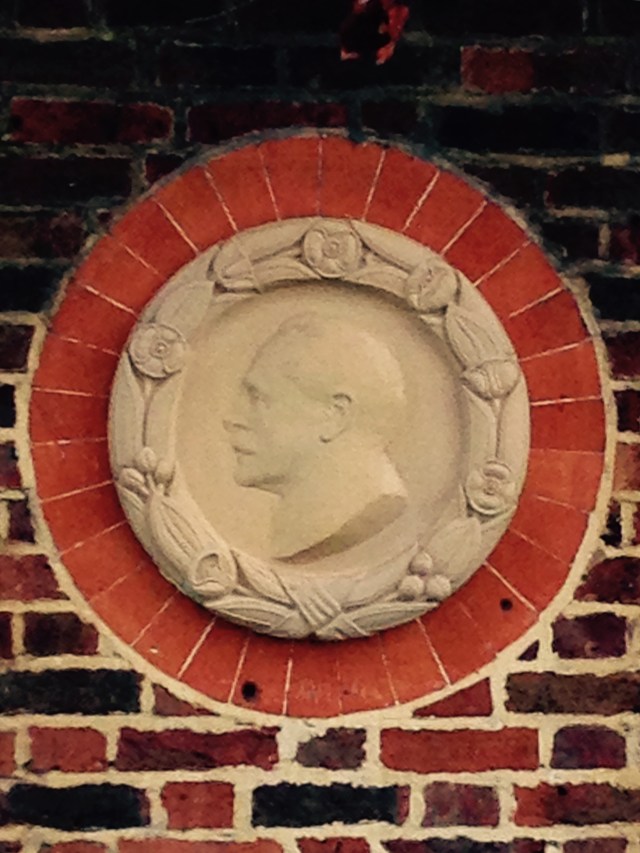
Profile of Douglas Haig on one of the Haig Homes in Morden
Most of the homes feature a bas-relief portrait of Haig, copies from the original in the Scottish National War Memorial. Some also have ceramic plaques, the inscription reading:
Remember with thankful pride the
services to King and country of
Douglas Haig
Field-Marshal Earl Haig of Bermersyde. OM. KT
Commander-in-Chief France
The Great War 1915-1919
As first President of the British Legion
He gave the last seven years of his
life to helping his comrades
This home was built
to honour his memory
Haig Housing is a relatively small organisation in the housing sector, now owning 1,500 homes, yet continues the legacy of providing quality homes for veterans. For further information see https://www.haighousing.org.uk/about-us/overview-history


